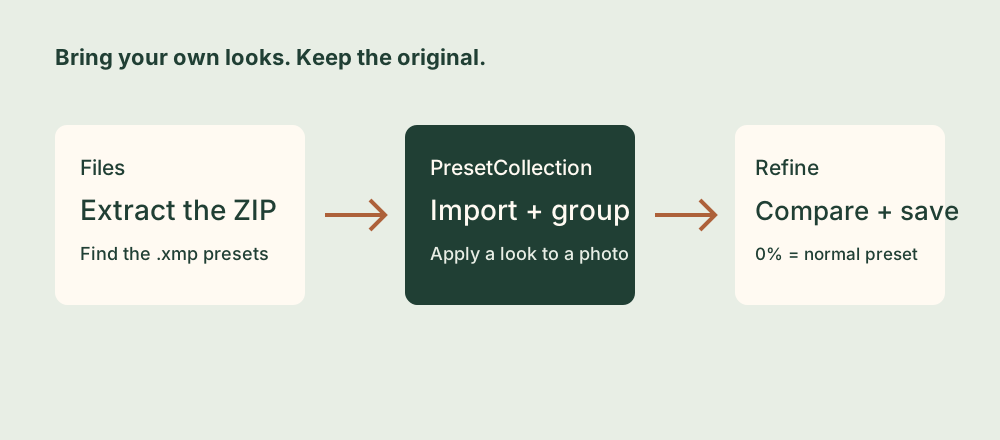
1. Start with the actual .xmp files
A preset pack may arrive as a ZIP download containing several folders, instructions, preview images, and more than one preset format. PresetCollection imports Lightroom-style .xmp preset files. The ZIP itself and the preview photographs are not the presets.
Save the download somewhere you can find in the iPhone or iPad Files app, such as Downloads or a named folder in iCloud Drive. If it is a ZIP archive, tap it in Files to extract its contents. Open the resulting folder and look for files whose names end in .xmp. If a pack includes several formats, choose its XMP version.
Use presets you created or have permission to use. Keep the original pack and its instructions outside the app as a backup. If the files are in a cloud storage location, make sure they are downloaded and accessible before importing.
XMP is also used for photo metadata and other settings. A file with that extension may be a sidecar belonging to a photograph rather than a reusable preset. Start with a known Lightroom or Camera Raw preset export, or the XMP files supplied as presets by the pack’s creator.
2. Import a few files or a complete folder
- Open PresetCollection.
- Tap the import button in the top-right toolbar.
- Browse to the folder in Files containing the .xmp files.
- Choose one or more preset files, or choose a folder containing presets.
- After import, open Preset Group and select the imported group.
For a large pack, begin with a small test import so you can confirm the files are the intended format. Once they appear and produce the expected general look, bring in the rest. Imported presets are copied into PresetCollection, so the app keeps its own imported copy; keeping your original download is still useful for backup or use in another editor.
3. Select the right group and try a look
PresetCollection reads a group name from inside each XMP preset when possible. The name you see in Preset Group therefore may come from the preset’s internal metadata rather than the name of the folder you imported.
If a preset seems missing, check the selected group before importing it repeatedly. Only presets in the current group are displayed. Choose a photo, select an imported preset, and assess the overall direction of the edit: color, contrast, brightness, and whether the look suits the subject.
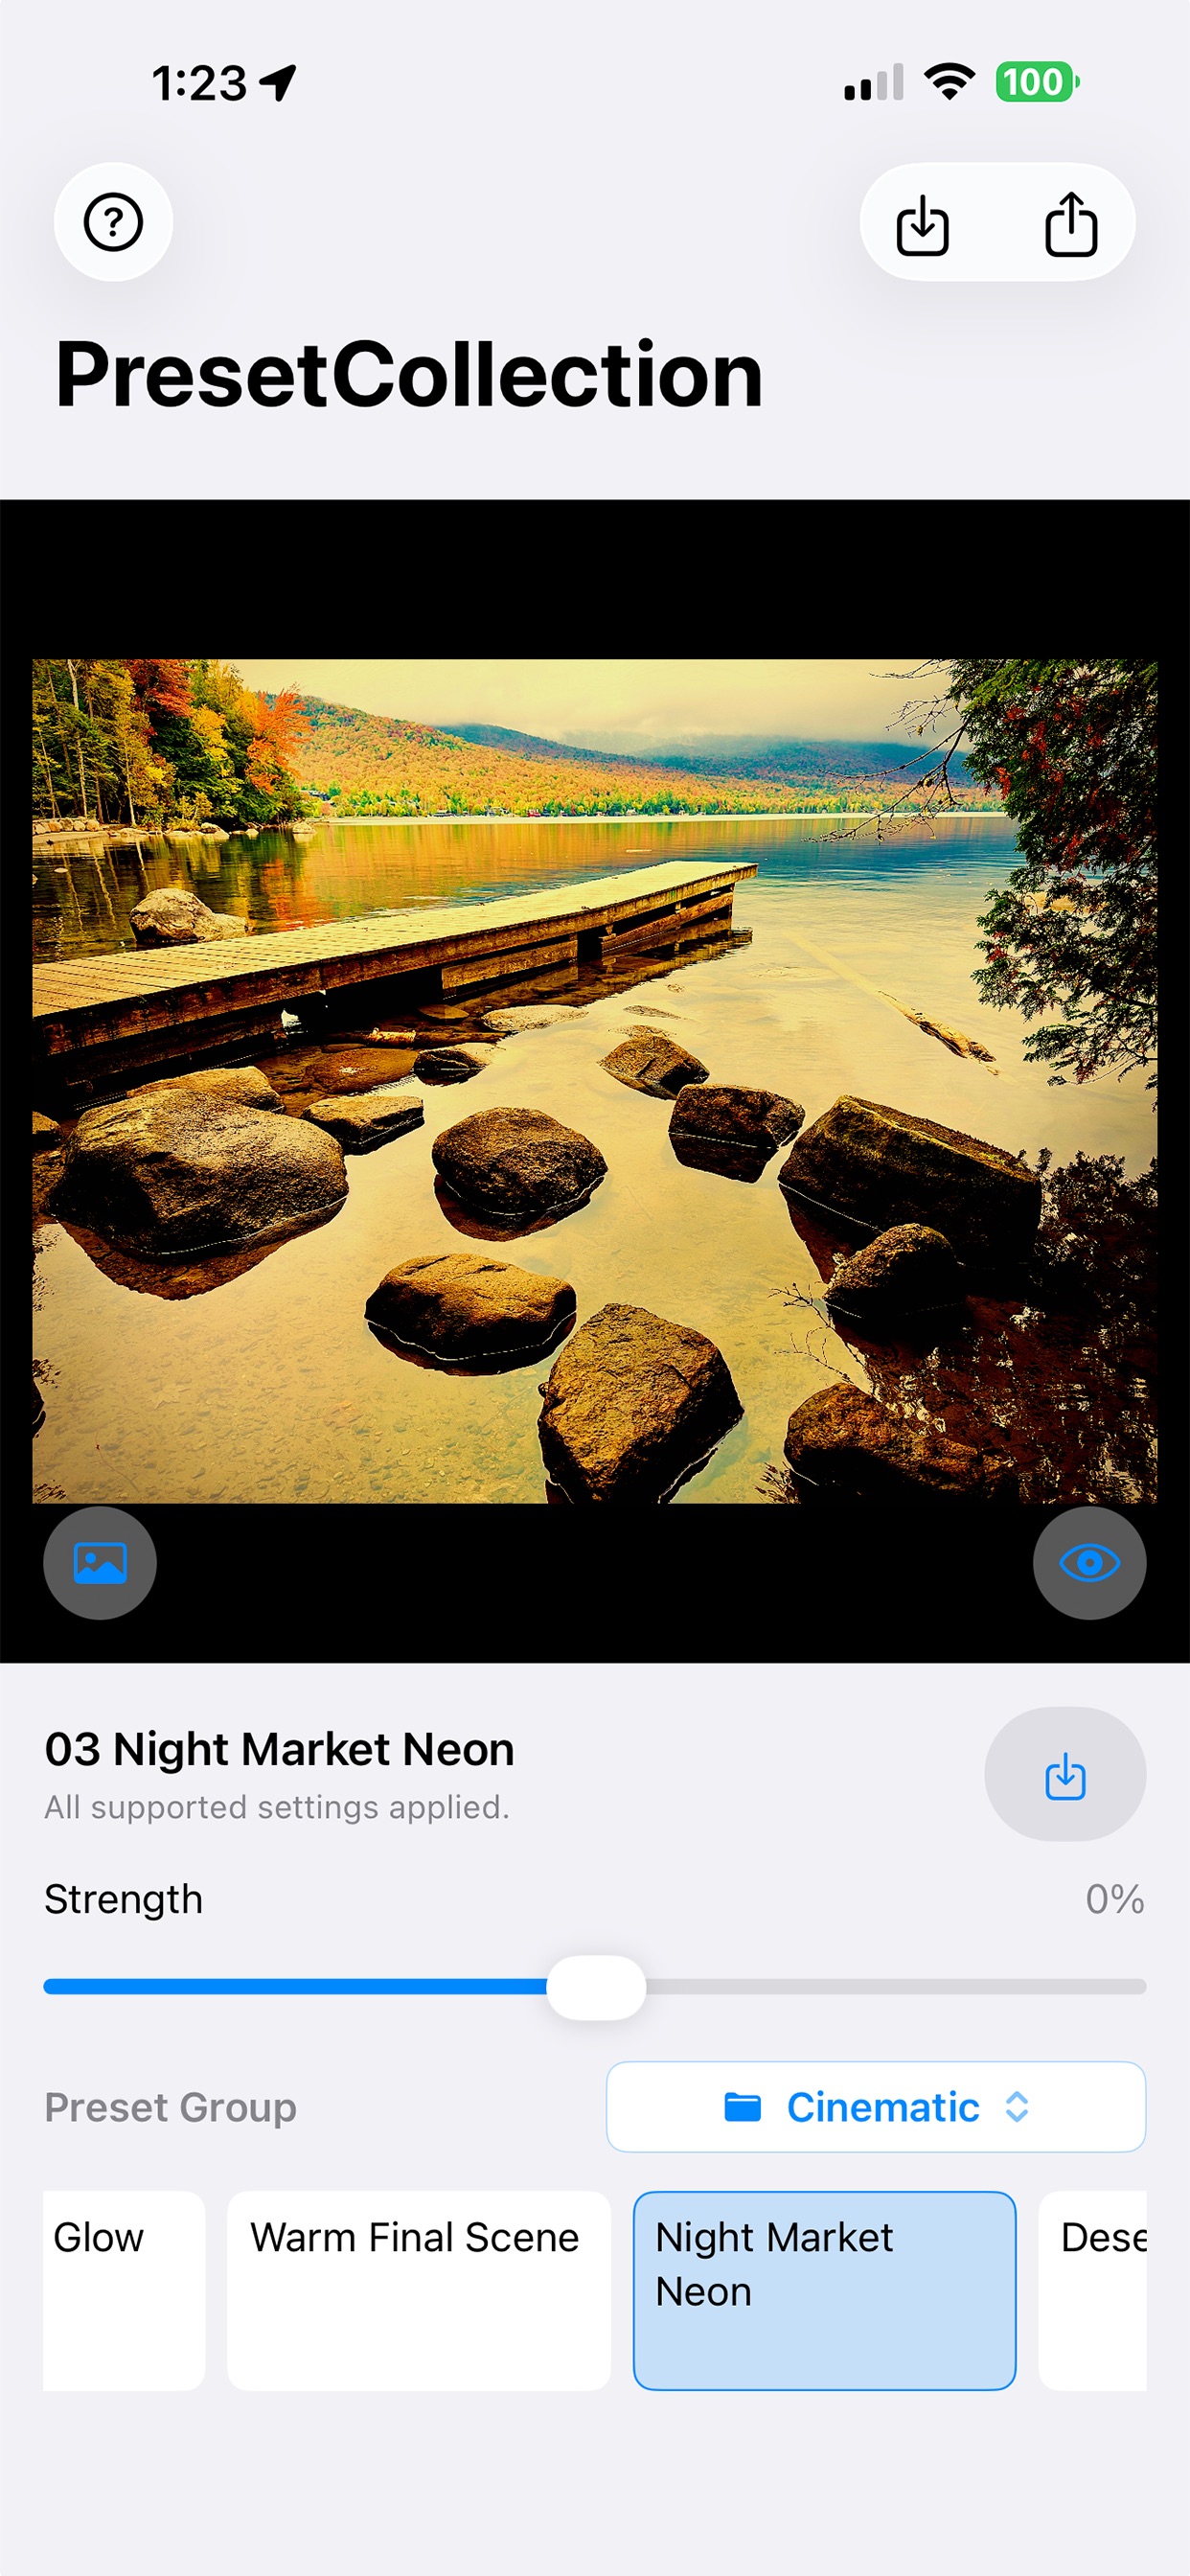
For example, try the same warm preset on an outdoor scene and an indoor portrait. A setting that flatters one image may push skin tones or highlights too far in another. Use the app’s before-and-after comparison to keep the source image in mind as you experiment.
4. Understand the Strength slider
PresetCollection’s center position, labeled 0%, is the normal preset look. It does not mean “no preset.” Move left for less effect and right for more effect. Selecting another preset resets Strength to the center.
Tap the eye button to compare with the original photograph. This is the useful reference when deciding whether the edit improves the image; moving the slider to its center simply returns to the selected preset’s normal strength.
Black-and-white presets stay black and white across the Strength range. Strength changes the surrounding treatment without restoring the source image’s color mode. If you want color, select a color preset or compare with the original.
Once you are satisfied, save to Photos or use the share sheet. Open the saved image to confirm you exported the version you intended, especially after trying several different presets in sequence.
5. Troubleshoot imports and different-looking results
| Problem | What to check |
|---|---|
| The preset does not appear | Extract the ZIP, confirm the file is an XMP preset, check that a cloud copy is available, then check the selected group. |
| The pack contains DNG or older preset files | Look for an XMP edition or ask the creator for a supported export. Renaming a file’s extension does not convert it. |
| The group name is unexpected | The app uses the group embedded inside the preset when it can read one. |
| The effect looks too strong | Move Strength left from center and compare using the eye button. |
| The edit differs from Lightroom | PresetCollection approximates supported settings using native iOS rendering. An exact Adobe Lightroom match is not expected. |
A preset should be treated as a starting point, not a guarantee that every source image will match a pack’s sample photograph. Different lighting, exposure, camera files, and the settings supported by the rendering engine can all affect the result.
To tidy a test import, press and hold a preset name and choose Delete Preset, or use the Preset Group menu’s delete option for a group. Keep your original XMP files before deleting anything you may want again. See PresetCollection support for app-specific import help.